> ## Documentation Index
> Fetch the complete documentation index at: https://docs.findtempo.co/llms.txt
> Use this file to discover all available pages before exploring further.
# CSV import
> Bring your opportunities into Deal Brain by uploading a CSV — no admin approval required.
If you can't connect [Salesforce](/integrations/salesforce) or [HubSpot](/integrations/hubspot) yet, you can upload a CSV of your opportunities instead. It gets your team running today without waiting on an admin.
CSV import is **point-in-time**. Data won't stay in sync the way a connected CRM does. You can re-run the export whenever you want to refresh, and you can connect a CRM later without losing anything.
## What the file needs
Deal Brain reads your column headers and maps them to its fields automatically, so exact naming isn't critical. What matters is that each row represents an opportunity, with its account and contact alongside.
A good starting set:
| Object | Recommended fields |
| ----------- | ---------------------------------------------------------------------------------------------- |
| Opportunity | Name, Amount, Stage, Close Date, Next Steps, plus any MEDDPICC or custom fields your team uses |
| Account | Account Name, Account Website |
| Contact | First Name, Last Name, Title, Email |
If your export produces one row per opportunity–contact pair, opportunities with multiple contacts will appear on multiple rows. That's expected — Deal Brain dedupes on import.
## Export from Salesforce
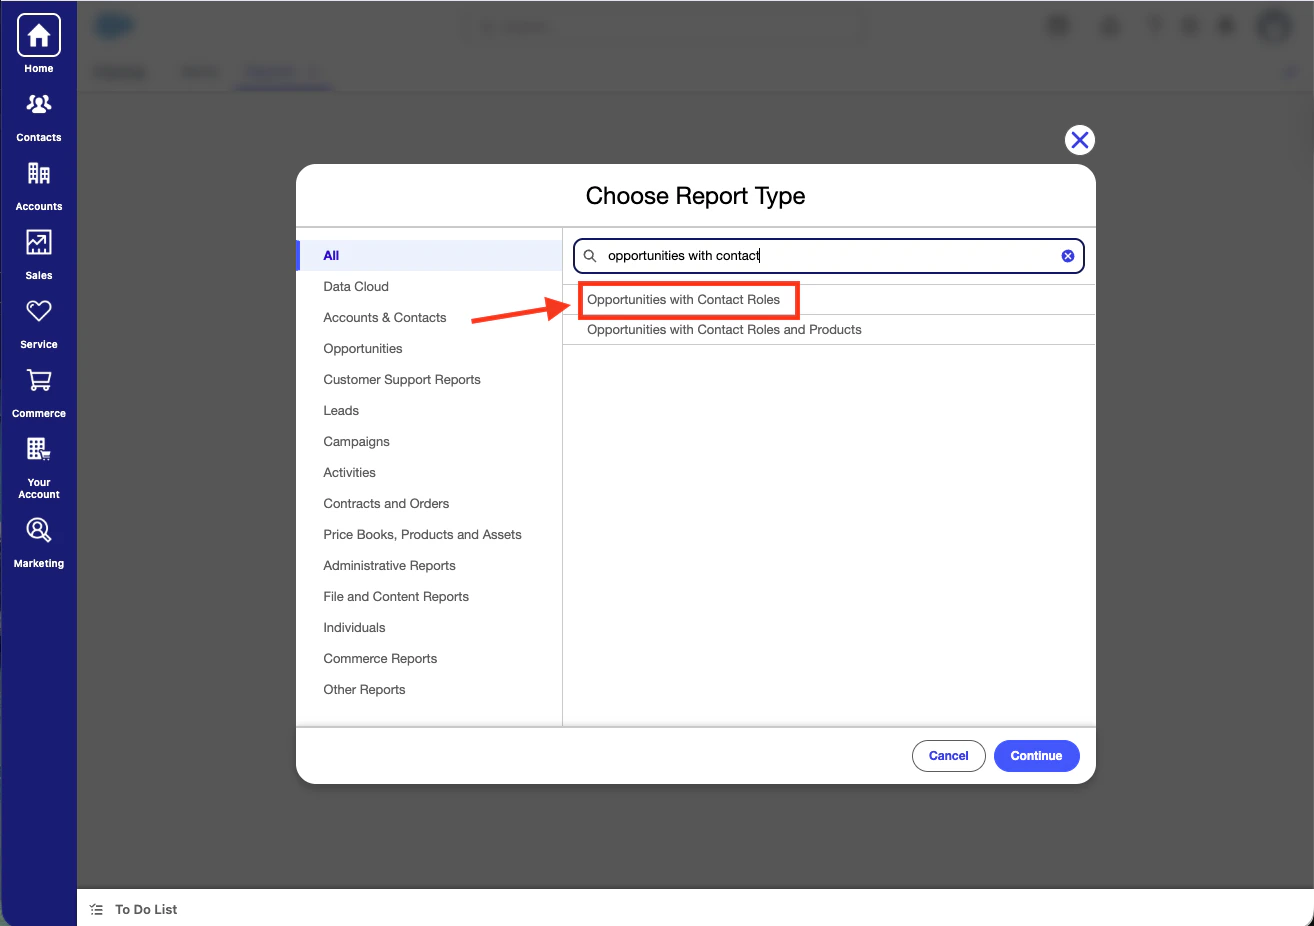
In Salesforce, go to **Reports → New Report** and choose the **Opportunities with Contact Roles** report type. This is a built-in Salesforce report that joins each opportunity to its contacts in a single export.
 Click **Edit** in the top right and use the columns picker to add the opportunity fields you want to track and manage in Deal Brain. This report will act as the source for what Deal Brain knows about your book of business. Many of the fields automatically visible (e.g. mailing address) may not be useful for your deal management, so feel free to unselect these.
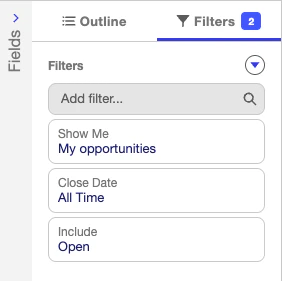
Open the **Filters** tab and confirm you're getting the opportunities you expect. The default **Close Date** filter is often too restrictive and hides open deals — broaden it if your row count looks low.
Click **Edit** in the top right and use the columns picker to add the opportunity fields you want to track and manage in Deal Brain. This report will act as the source for what Deal Brain knows about your book of business. Many of the fields automatically visible (e.g. mailing address) may not be useful for your deal management, so feel free to unselect these.
Open the **Filters** tab and confirm you're getting the opportunities you expect. The default **Close Date** filter is often too restrictive and hides open deals — broaden it if your row count looks low.
 Save the report inside Salesforce (e.g. **Deal Brain Export**) so you can re-run it later when you want to refresh your data.
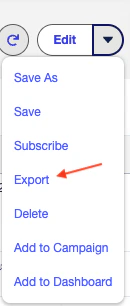
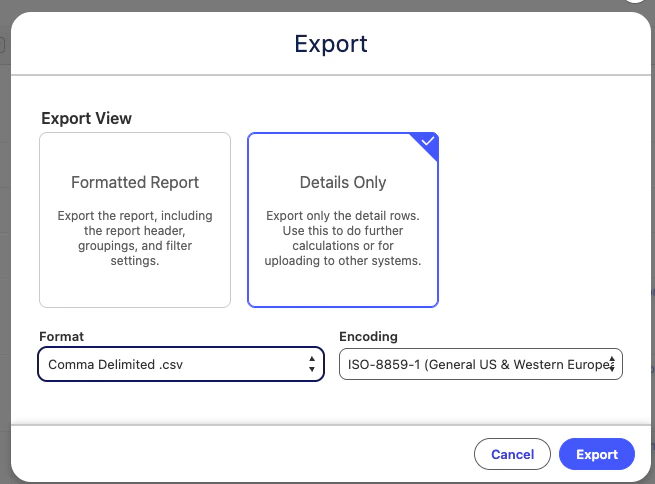
Click the down arrow next to **Save** and choose **Export**. Pick **Details Only** as the export view and **Comma Delimited (.csv)** as the format, then click **Export**.
Save the report inside Salesforce (e.g. **Deal Brain Export**) so you can re-run it later when you want to refresh your data.
Click the down arrow next to **Save** and choose **Export**. Pick **Details Only** as the export view and **Comma Delimited (.csv)** as the format, then click **Export**.
 You need the **Export Reports** Salesforce permission to download the CSV. If the export option is missing, ask your Salesforce Admin to grant it.
## Export from HubSpot
Export your deals from HubSpot with their associated companies and contacts included, as a comma-delimited `.csv`. Match the columns to the recommended set above.
## Upload to Deal Brain
During Deal Brain onboarding, click **Upload a CSV of your opportunities instead**.
Upload the file you exported. Deal Brain will read your column headers and map them to its fields automatically.
Review the import preview, then confirm. Deal Brain will create your opportunities, dedupe contacts across rows, and continue you through the rest of the onboarding flow.
## Moving to a connected CRM later
Nothing is lost. Connect [Salesforce](/integrations/salesforce) or [HubSpot](/integrations/hubspot) whenever your admin is ready, and Deal Brain switches to keeping your opportunities in sync automatically — including proposing CRM updates with citations, which the CSV path can't do.
You need the **Export Reports** Salesforce permission to download the CSV. If the export option is missing, ask your Salesforce Admin to grant it.
## Export from HubSpot
Export your deals from HubSpot with their associated companies and contacts included, as a comma-delimited `.csv`. Match the columns to the recommended set above.
## Upload to Deal Brain
During Deal Brain onboarding, click **Upload a CSV of your opportunities instead**.
Upload the file you exported. Deal Brain will read your column headers and map them to its fields automatically.
Review the import preview, then confirm. Deal Brain will create your opportunities, dedupe contacts across rows, and continue you through the rest of the onboarding flow.
## Moving to a connected CRM later
Nothing is lost. Connect [Salesforce](/integrations/salesforce) or [HubSpot](/integrations/hubspot) whenever your admin is ready, and Deal Brain switches to keeping your opportunities in sync automatically — including proposing CRM updates with citations, which the CSV path can't do.